Showing posts with label Reloved. Show all posts

Saturday, 16 August 2014

DIY Deck of Cards Wall Art

What I Made Today - Bathroom Reveal Part 2


You may have seen my earlier post on how to wallpaper using book pages here. I love the little feature wall in our downstairs bathroom now but wanted to make some artwork to accompany it. I had picked up this little pack of herb playing cards in the local charity shop because the botanical theme matched the book of wild flowers I used to paper so perfectly, but I wasn't sure how I was going to use the cards for a while. This is what I came up with!


If you'd like to make your own artwork using an illustrated deck of cards, here is a super easy tutorial...

What you will need

A pack of cards
A box frame
Small sticky foam pads
Paint or wood stain, paintbrush (optional)
Backing paper and double-sided tape (optional)


Method


I began by selecting the suite I wanted from the pack of cards - I considered mixing them up but felt it might look a little messy, so went for the hearts. I then laid them out on the box frame and decided how to arrange them.

My box frame (12x12") was £6.50 from Wilkos and is square, but I did have to leave the Ace card out because of this - if you buy a portrait frame you could include the Ace on a row of its own.

I next took the box frame apart and painted it. I wanted a darker colour to frame the white playing cards and so I used a tester pot of Cuprinol exterior wood stain in 'Wild Thyme' that I had lurking in the shed - and was quite pleased with how it turned out. I'm a big believer in making use of whatever is available in the shed!

If you are unsure what colour to paint your frame, I would suggest picking a colour out of the card illustrations. Or you can't go far wrong with buying a black frame!


Remember to paint all the parts of the box frame that you will see when it is reassembled, like this spacer section that fits between the glass and the back of the frame.

While the frame dries, you can start to stick the cards to the back of the box frame. I decided to leave the back of my frame unfinished, as the brown colour worked well with the dark green in my botanical theme. If you want to cover your board, however, now is the time to fix your backing paper to it - I suggest using double-sided tape around the outside edges for a clean finish.

Tip: check you have the frame's hanger in the right place before you start sticking cards down!

Spot the not-so-deliberate mistake!

To fix the cards, I used small sticky foam pads, as seen in the pic. I got these from Hobbycraft but most stationers' or large supermarkets stock them. The foam pads give each card a drop shadow, and means they stand in relief from the back of the frame. I love the extra interest this creates. 

If you are just wanting to place your cards flush(!) against the backing then you could use a normal frame instead, as the extra space a box frame gives you would not be necessary.


When your cards are fixed on and your box frame paint is dry, reassemble the frame and voila! Your playing card artwork is complete.


I felt a bit sorry for the Ace card being left out and so made him a frame of his own! I painted the backboard to this small frame the same colour as the box frame to tie in the colours.


must. buy. a. good. camera.
Now I just need to hang it along with a few other pieces!

Thursday, 14 August 2014

DIY Wallpapering with Book Pages

What I Made Today - Bathroom Reveal Part 1


We have a downstairs loo off our utility room - very handy but not very pretty. It's a small window-less white box, which needed a bit of an update. I've had a bit of a thing for vintage botanical prints and repro wallpapers for a while, and was looking out for one I loved enough to buy to use in there, then realised I could do it myself!

There are some fantastic wallpapers out there, but if you are on a budget or fancy doing it yourself, here is my 'how to' wallpaper using book pages. 


What you will need


  • A book of your choice - be it colour, illustrated, sepia or simply text.
  • A paper guillotine, or craft knife and ruler, or pair of scissors!
  • Wallpaper paste
  • A wallpaper brush, or a large paintbrush
  • A firm clean paintbrush
  • Plumb-line (optional)
  • A damp cloth

Method

Start by ripping the spine and cover off your book, or by pulling out the signatures. I picked up my book from an antiques centre for a couple of quid - try charity shops, car boots or eBay for similar.


Once you've done this you may have bits of glue or binding thread attached to the edge of your pages, so it's a good idea to trim the edges so that you have a neat finish and so that all the pages are a uniform size for when you are papering.


This is where a paper guilottine comes in handy. If you don't have one, a craft knife and ruler will work well, or failing that a pair of scissors and a steady hand! Try to cut through as many pages as possible at one time.


Now you are ready to start papering! The handy thing about small book pages is that you don't need a large wallpapering table, a small work surface will do. Using your wallpaper or large paint brush, apply a layer of wallpaper paste to the back of several book pages. It's a good idea to leave the paper for a few minutes to let the paste soak in, so do a couple at a time - but don't leave them so long that the paste starts to dry out.

Now start applying the pages to your wall. I began in the top-left corner of my wall and didn't use a plumbline - I placed them by eye - but you could use one for increased accuracy. If you don't have a plumbline, tying a key or something with a bit of weight to a length of string will work just as well. Place the first page against the wall, pressing it lightly with your hands. Now take your dry, clean firm brush and, starting from the middle of the page, sweep it towards the edges of the book page. Your aim is to fix the page to the wall without any big lumps of paste or air bubbles.


I overlapped my book pages ever so slightly - just by a few millimeters - to give me some room for movement and error, but a mismatched higgldy piggldy look could also look fab if you want to lay your pages over each other in a more exaggerated way.

You may get little bits of wallpaper paste seeping out the edge of your book pages - use your slightly damp cloth to wipe it off while it's still damp - when it dries it will leave a shiny mark and will be much harder to remove.

Carry on pasting and papering your wall until you have covered your desired area - if you come to the other end or the bottom of your wall and the pages overlap, use your craft knife and ruler to trim the excess.


The bathroom is small so this is the furthest away I can get to take a photo of the whole wall!


Next I am planning to make some artwork for the other walls to carry on the botanical print theme - watch out for the tutorial for this pack of cards artwork in the next part of the bathroom reveal!


Monday, 11 August 2014

DIY Vintage Teacup Wedding Favour

A Tutorial from my own Vintage-Inspired Wedding

I'm quite excited to write a tutorial based on my own wedding, as it's an excuse to look back over all the photographs and re-live the planning and the day itself. So here we go ... here is how to make your own favours from vintage teacups! 


House of Newns Vintage Teacup Favours // Adam Drake Photography
There are so many options for favours at weddings, and if you have chosen to make them yourself the possibilities for personalisation are endless. I chose to give teacups filled with sweets to all the women at our wedding. If you would like to do the same, here is what you need.

If you fancy filling your teacups with something other than sweets, check out my post on Five of the Best Vintage Teacups here.


What You Will 
Need

  • Teacups! I sourced mine in sets of six or so from eBay and family. You could also try thrift and charity shops. Steer clear of general auctions and well know potteries if you are trying to keep costs down!
  • Sweets I bought mine from Macro in large tubs. Amazon and Hobbycraft also sell sweets in bulk but they are a little more expensive to buy this way rather than from a cash and carry. We went for sherbet lemons, strawberries and cream, and rosy apples.
  • Cellophane I bought a roll of 50cm x 20m cellophane in the florists' seciton of Hobbycraft. I used plain but you can get it with little patterns and designs on too!
  • Florists' Wire Again I got this from Hobbycraft - I bought the Oasis (brand) bobbin of wire rather than the packs of individual wires and had more than enough
  • Small sticky foam pads - Hobbycraft again but most stationers' will sell these
  • Strong scissors
  • Luggage tags (optional)
  • A team of bridesmaids or helpers!

My place setting on the day - spot the teacup top left! // Adam Drake Photography


Method

Once you have chosen your teacups and decided if you want them matching or if you are going to mix and match the cups and saucers (I did a combo of both) you might want to give them all a wipe or clean - though as you have the cellophane this is optional!

Mix and match teacups and saucers for a more shabby chic look

Next, I would recommend securing the teacup to the saucer. I used 3-4 small foam pads on the bottom of each cup. This will help you transport them and allow people to take them home without breaking them!

Some of the 50+ teacups I sourced - one for each woman guest!

Now you need to wrap your sweets ready to go into the teacups. Measure your teacups first to gauge roughly how many sweets you will need - I think we used 6-7 of large boiled sweets.
Cut squares of cellophane and place the sweets in the middle, then gather together the four corners and twist the sweets from the bottom. Now tie a length of the florists' wire around the top of the sweets, leaving the corners free to spread out a little, as seen here. it's not a precise science so don't worry to much if some look a little more unruly than others!

House of Newns Vintage Teacup Favour // Adam Drake Photography

This is where the bridal party comes in handy! I had a favour-making evening at my house and each person had a different job. Eg: One person stuck the saucers to the cups; one person cut the cellophane squares; one cut the lengths of wire; one measured the sweets into the cellophane then twisted and tied them etc. We had Prosecco and bellinis and it was great fun! (Mother-in-laws are optional.)

Once all your teacups have their sweets, you may also want to tie luggage tags to the teacups to double them up as place settings. I hand wrote mine but stenciling or stamping looks great too.

The table displays with mis-matched teacups favours - the night before hence no flowers!

And voila! You have some beautiful and personal gifts for your guests. My only other tip would be to write 'take me home' on the tag too - some of my guests didn't realise they could take the teacups as well as the sweets so my bridesmaids had to go round the tables telling everyone!

Here are a few pics from my wedding ... just because!

House of Newns // Adam Drake Photography


Sunday, 3 August 2014

Reloved Toy Box

What I Made Today

A lot of the furniture in my home has either been 'adopted' from my friends and family, or picked up on eBay and upcycled, or even found on Freecycle for, well, free. It's not so much that we have had to be really thrifty, as much as the fact that I love having furniture and items around me that have a history, or that I have been able to shape and alter to my will!

So when I was pregnant and my parents were moving, it was a great opportunity to get my hands on some furniture that they weren't taking with them to their new houses, and that my little baby could use. 

This toy box was made by my dad and was much loved, shall we say! My mum had last recovered the cushions for my younger brother, but the foam was still in good shape. I can't say who the culprit for all the stickers was, I think that might have been all of us...!


I started by wiping down the wood with a sugar water solution to remove all the dirt and general grime (who knows what some of stains were caused by), then soaked and attacked the stickers with a wallpaper stripper tool.


I waited for the wood to dry then lightly sanded it. To be fair, it was pretty well keyed from its years being scuffed. I am also terrible at preparation - if I could get away with doing none at all and going straight in with the paint/sewing/whatever craft I'm doing I would!

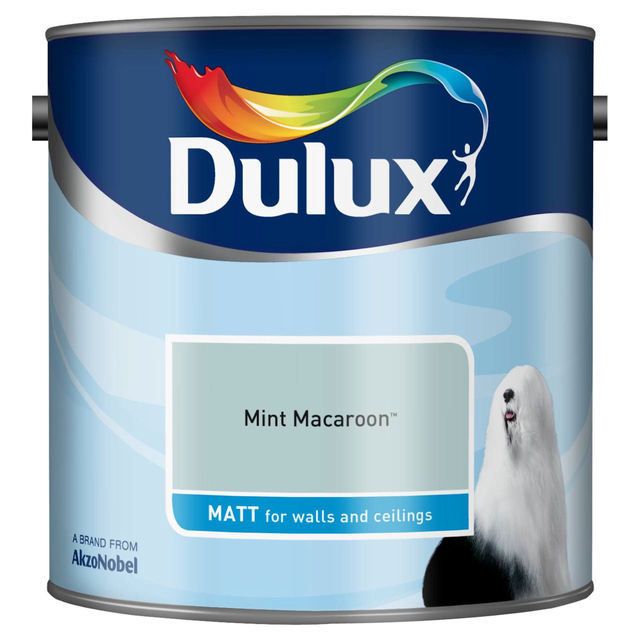
One of the feet had also fallen off so we added a few new screws. Next it got a couple of coats of Dulux Mint Macaroon, which I have also painted the sproglet's wardrobe in. No pictures of this stage...ahem


Then I created some REALLY simple cushion covers, based on the existing ones. I essentially cut a long rectangle twice the length of the square foam, with enough fabric to go round the sides and form seam allowance. I hemmed the two shortest sides of the rectangle, then folded it in half lengthways, right sides together, and sewed along the longest edges. This formed a tote-bag shape which I slid the foam into.

I used fabric from the Bluebird Park range by Moda bought at ... Abigail Crafts of course!

To close the cushion cover I stitched Velcro in three places to the opening, then simply folded the corners in for a tight fit. I'm sure there is a more professional way of creating a box-shape covering but, well, see the earlier comment about me and preparation...

Here you can see two of the three Velcro fastenings.

I love this fabric and also have made curtains from it, and plan to make bunting from the Bluebird Park range. Like the Rupert Bear dress I posted about, it's pretty but not pink and sickly girly ... if she had popped out and actually been a boy I would still have been happy with this fabric! Check out my mood board for the nursery on my Pinterest page 'Little Rooms' and here.

I really wanted the room finished before she was born but it didn't quite happen - let's blame the fact she was two weeks early! The toy box, however, was ready :). Here it is in all it's reloved glory.


Don't you love the baby Converse? Bought by her fab uncle, but too big atm. 


My next project for the sproglet's room is this handless chest of drawers... I am not responsible for the baby modelling in this photo! Hope to start this project soon and have an idea for the handles that are missing I can't wait to try - watch this space!

Chest of drawers from the in laws this time - she does not look impressed with grandad!


Friday, 1 August 2014

DIY Scrabble Wedding Present

What I Made Today

So here it is - the first post on the blog!

I thought I'd kick off with a mini DIY tutorial of something that has been popular on my Pinterest Board 'What I Made Today' - a wedding present I made for my brother and his fiancee when they got married. 

It's a really fun and personal present, with so many variables and options. You could also use it for an engagement or new baby gift!


What you will need


  • A box frame (try Ikea or Wilkinsons)
  • An old Scrabble board (charity shop, ebay etc.)
  • Multi-purpose glue
  • Scissors (possibly a small hack saw!)
  • Scanner and printer (optional)

It really doesn't matter what kind of Scrabble set you use, but it may affect the size of your finished piece and also how easy it is to resize the Scrabble board. The Scrabble board I used here was a travel Scrabble set, which came with a perforated board for the small letters to clip in to. Travel sets have smaller tiles; children's Scrabble a more simplistic sans serif font; normal Scrabble will give you a larger size tile and so you may want to but your box frame according to the size you want you finished piece to be.


I also created one for my cousin Gavin and his wife, don't tell them it was a recycled gift idea...!


Method

Take the back piece out of your box frame and lay it on the Scrabble board - I chose to place the centre of the Scrabble board at the centre of the frame. Mark or draw around the frame's backing so you can see how much scrabble board will fill the frame.
Tip: you could use masking tape to avoid marking the Scrabble board if you go wrong.

Choose the words that you would like to spell out. I went for first names and, in the top example, 'love', 'marriage' and rings'. Have a play around on the Scrabble board to see how you can interlink the names and what arrangement this gives you; the chances are there will be a couple of different combos. 
Tip: use the vowels to allow easiest intersections.

Bear in mind the shape of your box frame - landscape, portrait or square. I had chosen a square frame so was looking for a balance of words covering the whole square.
Tip: once you are happy, take a snap of the layout on your phone to allow you to recreate it more easily later.

Remove the tiles and cut the Scrabble board down so that it will fit inside the box frame, cutting just inside the marks you made earlier. Depending on the type of Scrabble board you have, you may be able to do this with strong kitchen scissors, or you may need to use a small hack saw. 
Tip: you could scan in your Scrabble board and print it out on paper, letting you reuse it as many times as you want!

Now glue your letters down onto the Scrabble board - take care to ensure glue doesn't seep round the edges. When dry, you are ready to place your board and layout in the box frame.
Tip: If your Scrabble board is quite thick, you may be able to do away with the original box frame backing.

Happy Scrabbling!